
How I Create Consistent Hero Images, And Why I Haven't Switched to NanoBanana
The complete system behind my brand images—from base setup to 10-second automation

How do you create your hero images with consistent character?
Every once in a while, I’d get such messages. Each time I’d explain it:
Create a series of images of that character: front, side, back, smile, not smile
Each time I need to create something, I attach the image and add my description, ask ChatGPT to give me a thorough prompt
I will then send the prompt together with the image to ChatGPT to generate the proper one
Then people followed up with “but how exactly?”
Even with Gemini being so good and so fast now, I still got the same question yesterday from
when most of my AI friends are having fun creating images.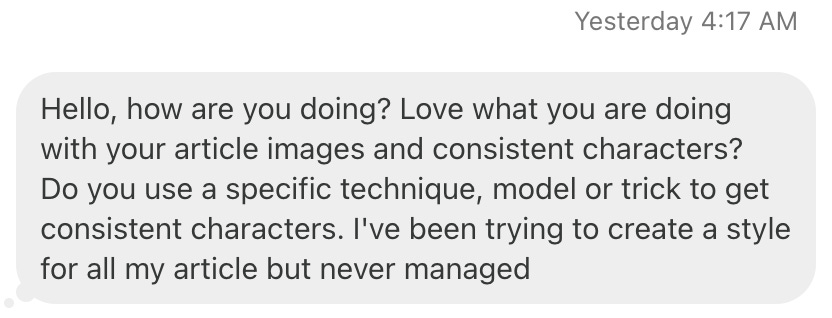
That’s when I asked myself: would I switch directly to the faster Gemini model? My answer was... maybe. And that pause made me realize: this isn’t just about one-shot consistent image generation. People are curious about the system behind it.
What I thought was intuitive might not be THAT intuitive or explanatory. So it’s about time for a complete roundup about the workflow, the process, procedures, setups, and my takes about the models.
Before we dive in, let’s talk about why this matters at all.
Consistent hero images create brand recognition.
When someone sees that 3D cartoon character in their feed, they know it’s from you before they even read the title. In a crowded newsletter landscape, that instant recognition is valuable.It also signals professionalism.
Wildly inconsistent images make it look like you’re grabbing random stock photos or experimenting without direction. Consistency shows intentionality.Most importantly, it builds trust through coherence.
Your visual identity reinforces your written voice. When both are consistent, readers feel like they’re hearing from the same person every time, which builds connection over time.

So with that context, let me take you through how I discovered what works, starting from the very beginning.
1. How I Found the Best AI Procedure
First off, the Pixar-style 3D cartoon images are my favorite style. I love watching 3D cartoons, and they make me feel delightful.
In my early days, I’d use ChatGPT’s DALL·E model to create cute 3D animal images, because they are just sooo adorable.

As I wrote more and started to pick up traction, the branding idea naturally slipped in. Without much debate, I chose my profile picture as the source of truth.
I uploaded my profile picture and literally asked ChatGPT to create front, side, back, sit, stand, talk, walk, happy, confused... all sorts of postures. That became my cartoon image pool. Not yet styled or tailored to fit into specific stories, but serving as the baseline for everything that came next.
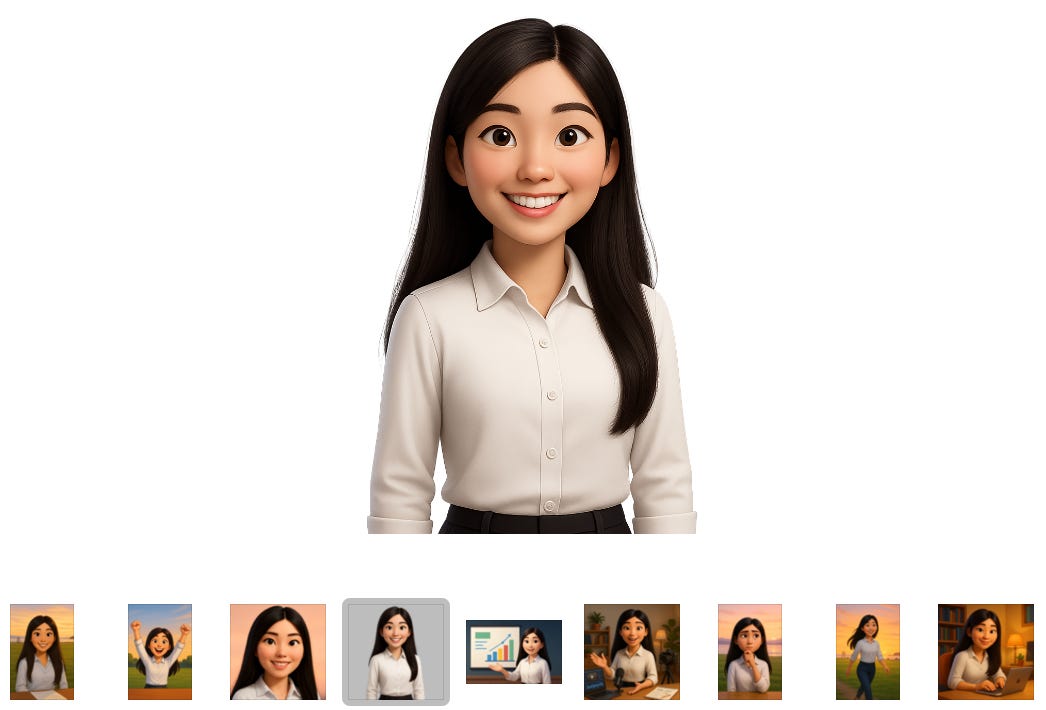
I have a specific project in ChatGPT called “Images,” with a system prompt and those base cartoon files in it. Each time when I need to create a 3D image for an article, I’d go to that folder and start prompting.
Through experimentation, I discovered ChatGPT 4o worked best for me. It captured that subtle feel I wanted, a little mystic, a little fun, not the rigid light blue and paper white look that other approaches gave me. I’ll walk you through the exact process in a moment.
Of course, I tried newer models and Gemini too. They had strengths, but each had deal-breaker issues for my specific needs. They are things that might not matter to you, but were crucial for my brand setting. I’ll explain those trade-offs in detail later.
One validation moment stands out: I published an article about voice transcription with a hero image of me talking magic to a tree that grows as I talk.
commented asking for the image prompt. I was surprised anyone would be curious about it. I shared the prompt and he came back with his version, nearly identical to mine. That’s when I knew this wasn’t my quirky workflow anymore, it became transferable.2. The Step-by-Step ChatGPT Workflow
Here’s how it actually works day-to-day.
My Setup
I have a ChatGPT project folder called “Images” with:
A system prompt that defines my style preferences (3D Pixar, 16:9 ratio, etc.)
Base character images (front, side, back, sit, stand, various expressions)
These reference images maintain character consistency
The Workflow
Step 1: When I need a hero image for an article, I go to that ChatGPT project folder.
Step 2: I describe what I want for the image: the scenario, the mood, the action.
Step 3: I attach the relevant reference images that match the pose or expression I’m going for.
Step 4: ChatGPT generates a detailed, thorough prompt that incorporates my style preferences, the reference character, and the scenario I described.
Step 5: I use that generated prompt together with the reference image to have ChatGPT create the actual hero image.
Step 6: Usually it takes 1-3 shots to get it right. The system prompt and reference images provide enough context that iterations are minimal.
A Real Example
Let me show you how this worked for the article about learning Claude code in 30 minutes.
Article topic: Claude Code for Everyone in 30 Minutes
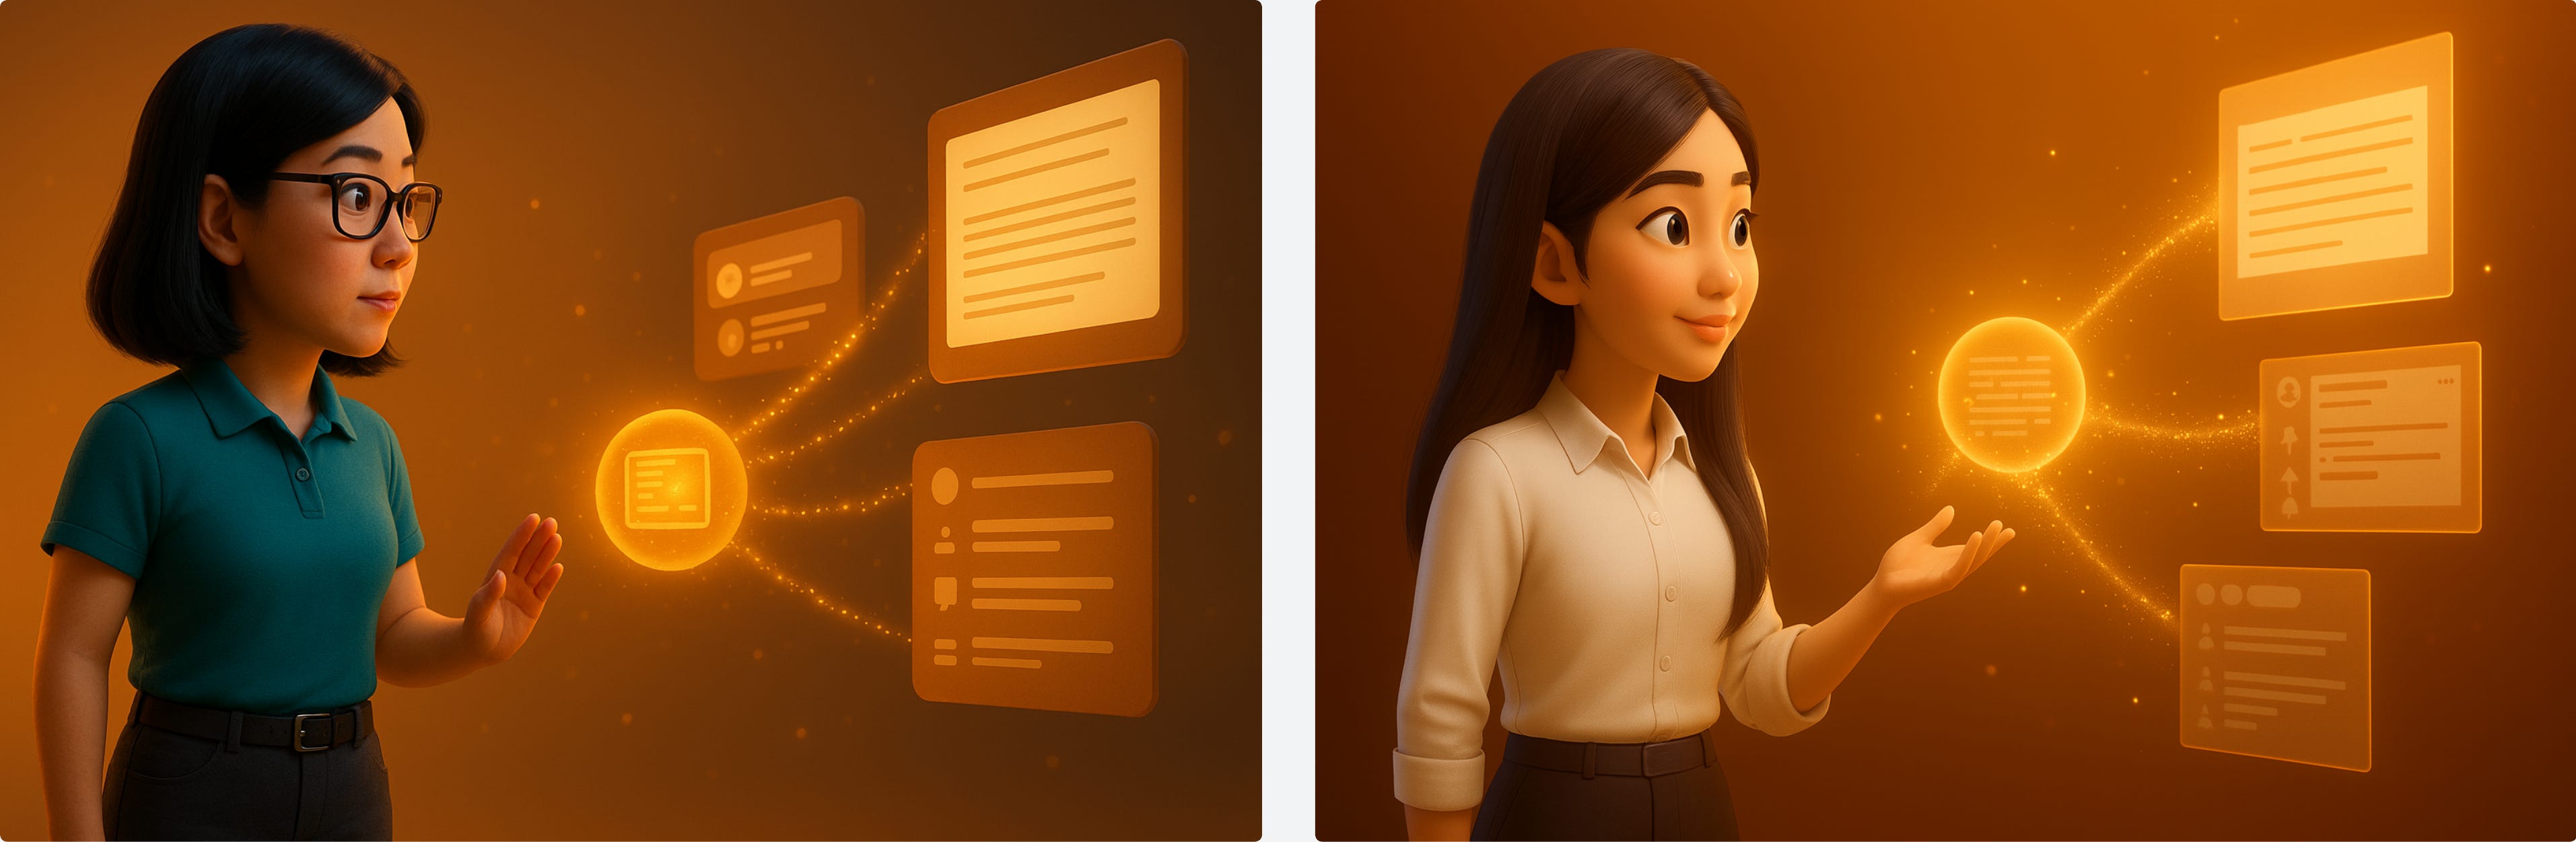
What I needed: Character tidying the mess on the floor, with calm focus, magical cloud (representing Claude) transforming chaos into order
The prompt ChatGPT generated:
A 3D cartoon-style young woman with smooth skin (shared in the file), large expressive eyes, and long straight black hair (inspired by Pixar and Disney), is kneeling on the floor with a calm, focused expression. To her left, a glowing magical cloud (representing Claude) hovers above a neat, organized stack of papers and folders, radiating soft golden light and magical sparkles. To her right, a chaotic pile of cluttered papers and messy objects represents unresolved problems. The magical light from the cloud appears to be gently transforming the mess into order. The scene is set in a cozy room with soft, cinematic lighting and a blurred background. The mood is enchanted and hopeful, emphasizing problem-solving and calm focus.
Result: One-shot success.

This workflow is reliable and relatively quick once you have the foundation set up. But it wasn’t always this smooth. Next, let me explain why I landed on this specific approach instead of the alternatives everyone’s talking about.
3. The Comparisons: Why Not Newer ChatGPT Models? Why Not Gemini?
This workflow works beautifully with ChatGPT 4o. But you might be wondering:
Why not the newer ChatGPT models?
Why not Gemini, especially with all the hype around its image generation capabilities?
Fair questions. I’ll show you what happened when I tried them.
Why Not Newer ChatGPT Models?
I started noticing that newer ChatGPT models weren’t working as well for me.
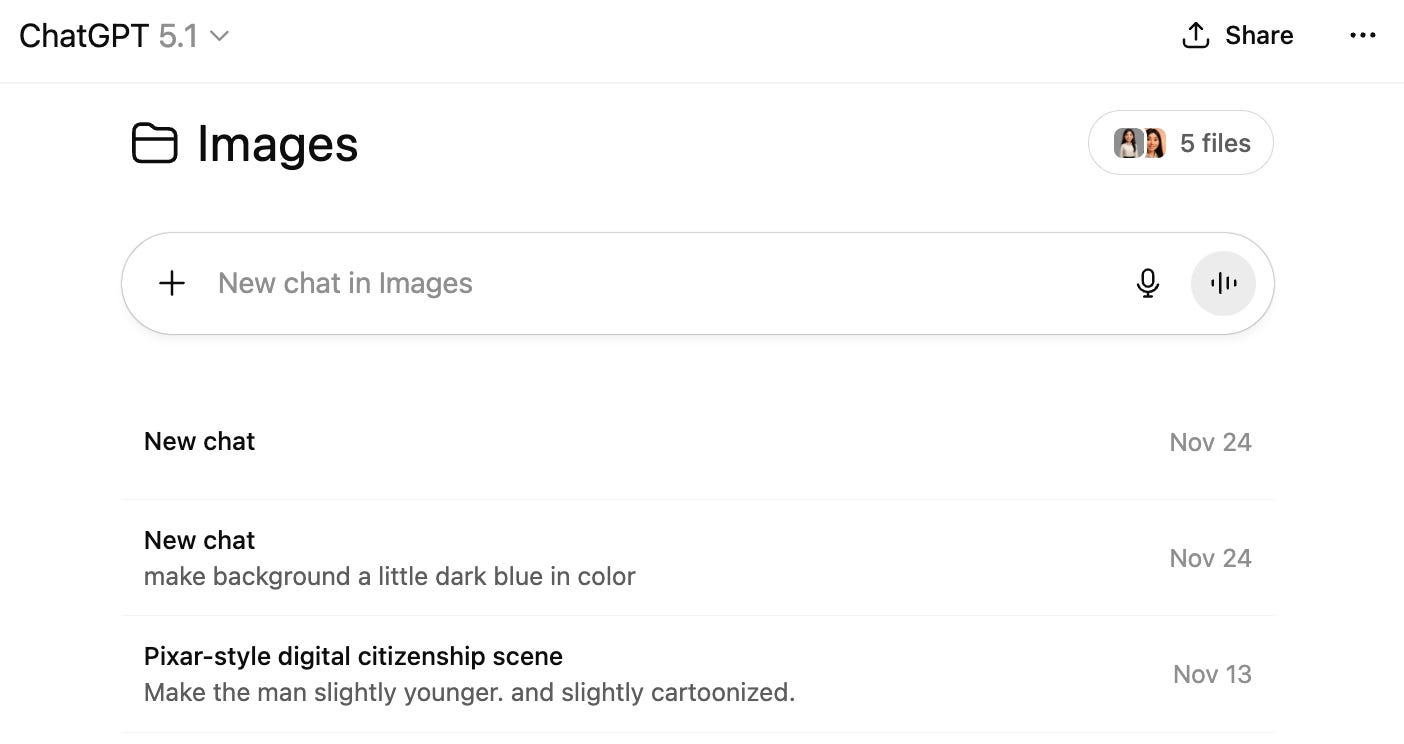
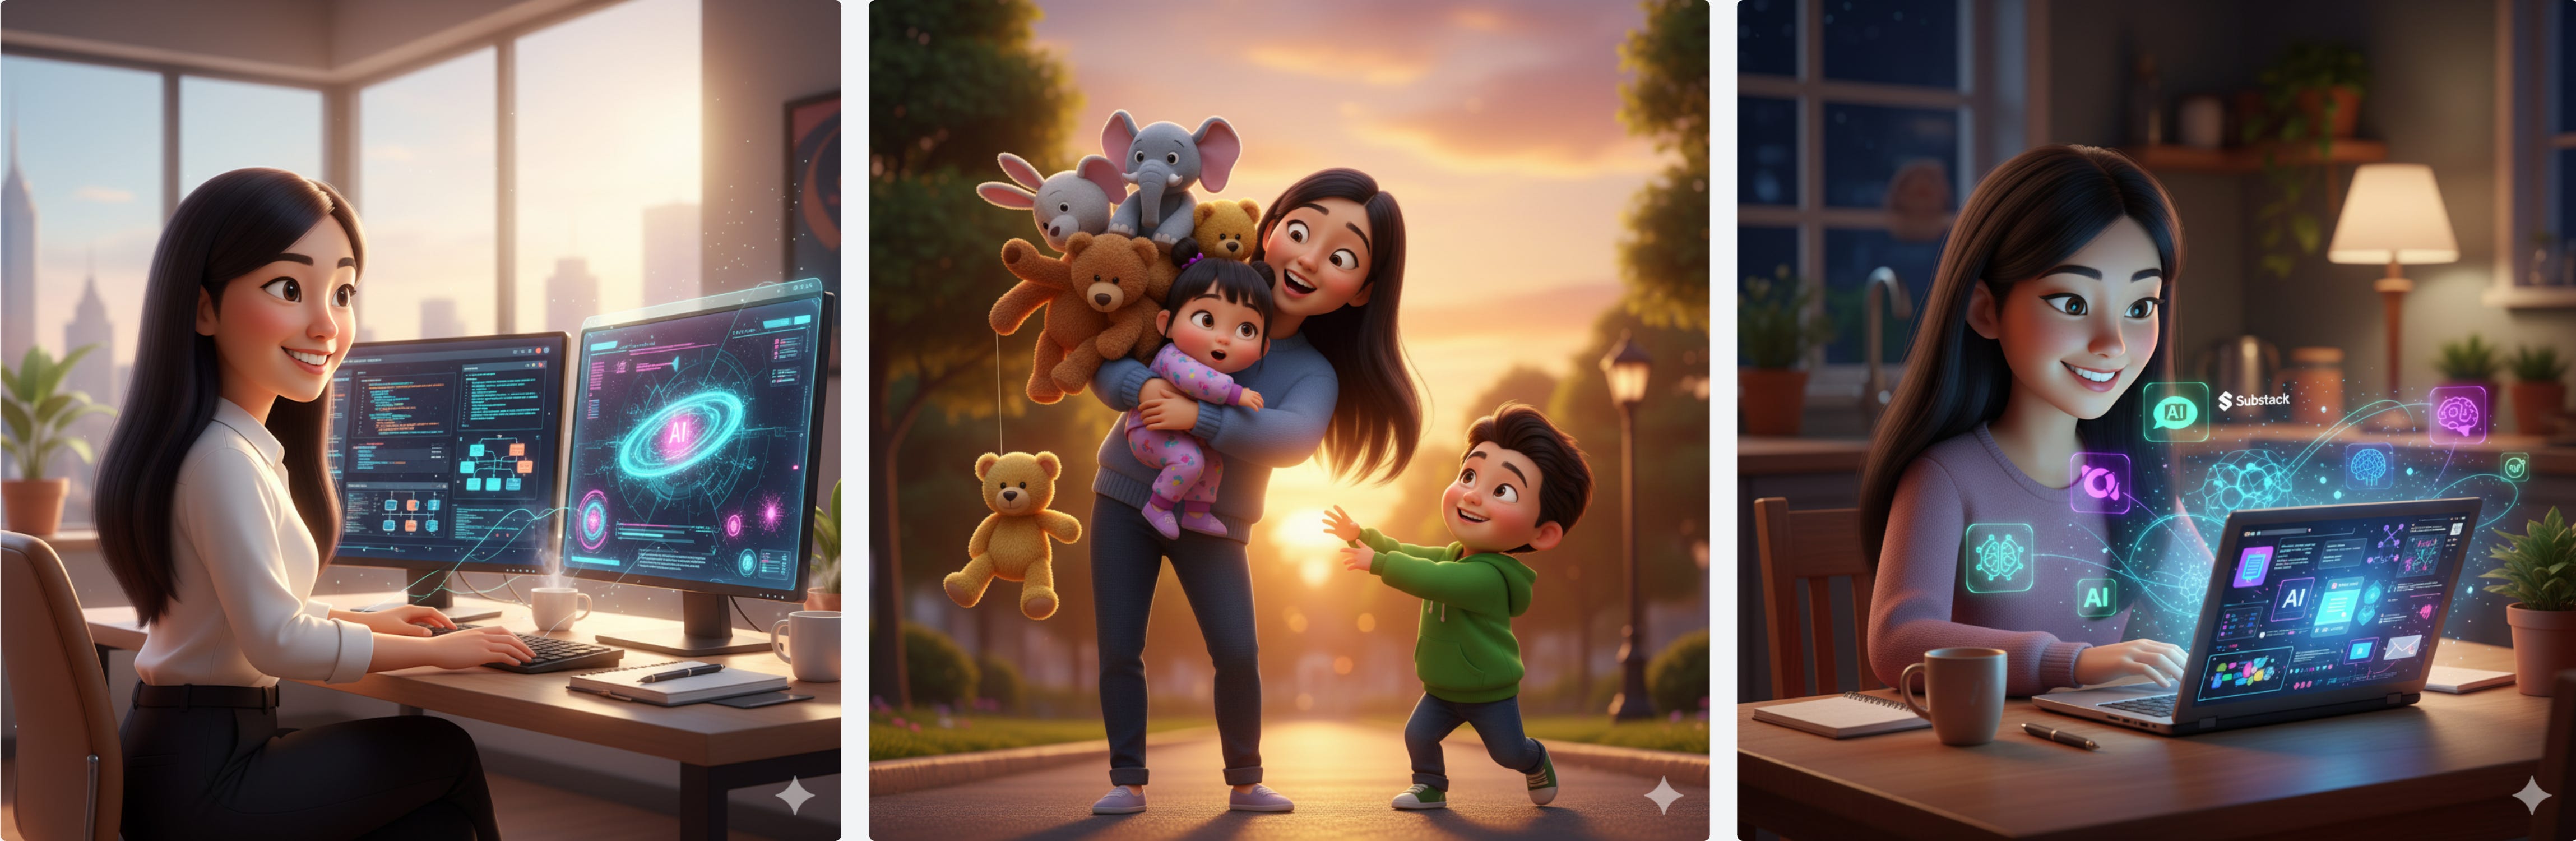
There were times when I accidentally used a prompt without specifying to use 4o, and the default newer model would turn out disastrous. Look at this image for my call for AI builders article, with left using non-specified model and right side using 4o.
Suddenly short hair? Why is the character wearing glasses now? Why is the skin tanned?
Are you judging based on stereotypes? Are you making assumptions about what it means to do knowledge work, or what a “healthy person” should look like?
I wanted that little mystic, that little fun look. Not the rigid, overly polished style the newer models kept producing. The subtle feel was off.
Why Not Gemini (NanoBanana)?
That’s a totally fair question. I have tried Gemini for various projects, and it was mostly amazing. Fast, powerful, and often impressive.
Except... the feel of the cartoon person looks a little off to me.
Let me show you a specific example. I needed an image for my article about first hitting Substack rising board. My character in a mysterious forest, picking up a gem. I wanted that curious, wonder-struck feeling. You know, that moment of “what is this thing?”
What I wanted: Mysterious look, forest setting, picking up gem, curious and genuinely surprised feel
What Gemini generated: A very futuristic, mature, confident woman. Attractive, sure. But she looked like she was about to take charge of the metaverse, not humble, not encountering something fantastic and new.
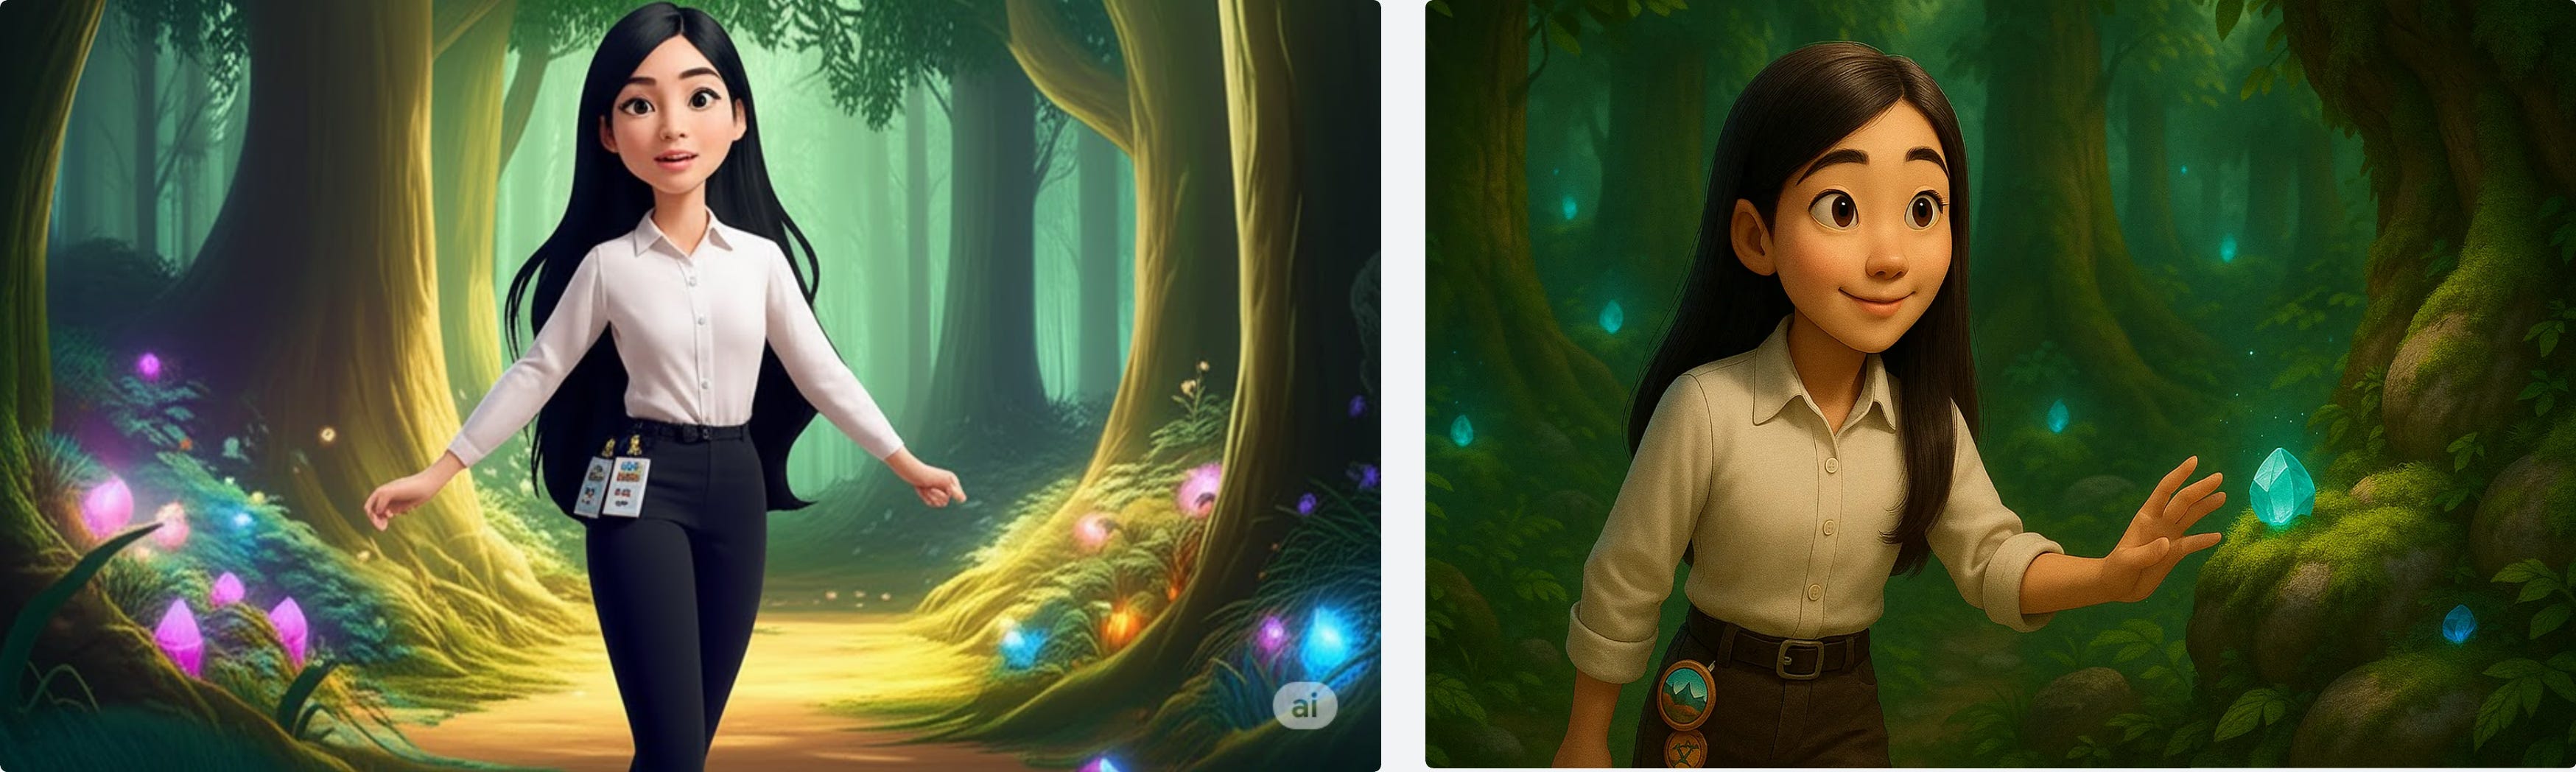
Don’t get me wrong, ChatGPT’s image generation isn’t perfect either. But it’s those subtle differences: the size of the head, that facial expression, the background color and scene. Gemini’s outputs feel a bit mechanical to me. And other times, they look… too modern to be me.
And if you’re Asian, you’ll immediately spot the drift. The face shape, the features, the subtle proportions. The specs might say “consistent,” but cultural context reveals what algorithms miss. What looks “close enough” to some people isn’t consistent when you know what to look for.
There are also technical issues: Gemini still doesn’t get the size and ratios right. Whenever I share a square reference image and request 16:9 ratio for newsletter headers, it fails. For newsletter formatting, wrong aspect ratios break layouts. This is functional, not aesthetic preference.
What Gemini DOES Work For
It’s entirely my personal preferences in terms of hero images. But I do use Gemini for many other scenarios, such as:
Small location swaps of image parts
Changing clothes
Changing text or words in images
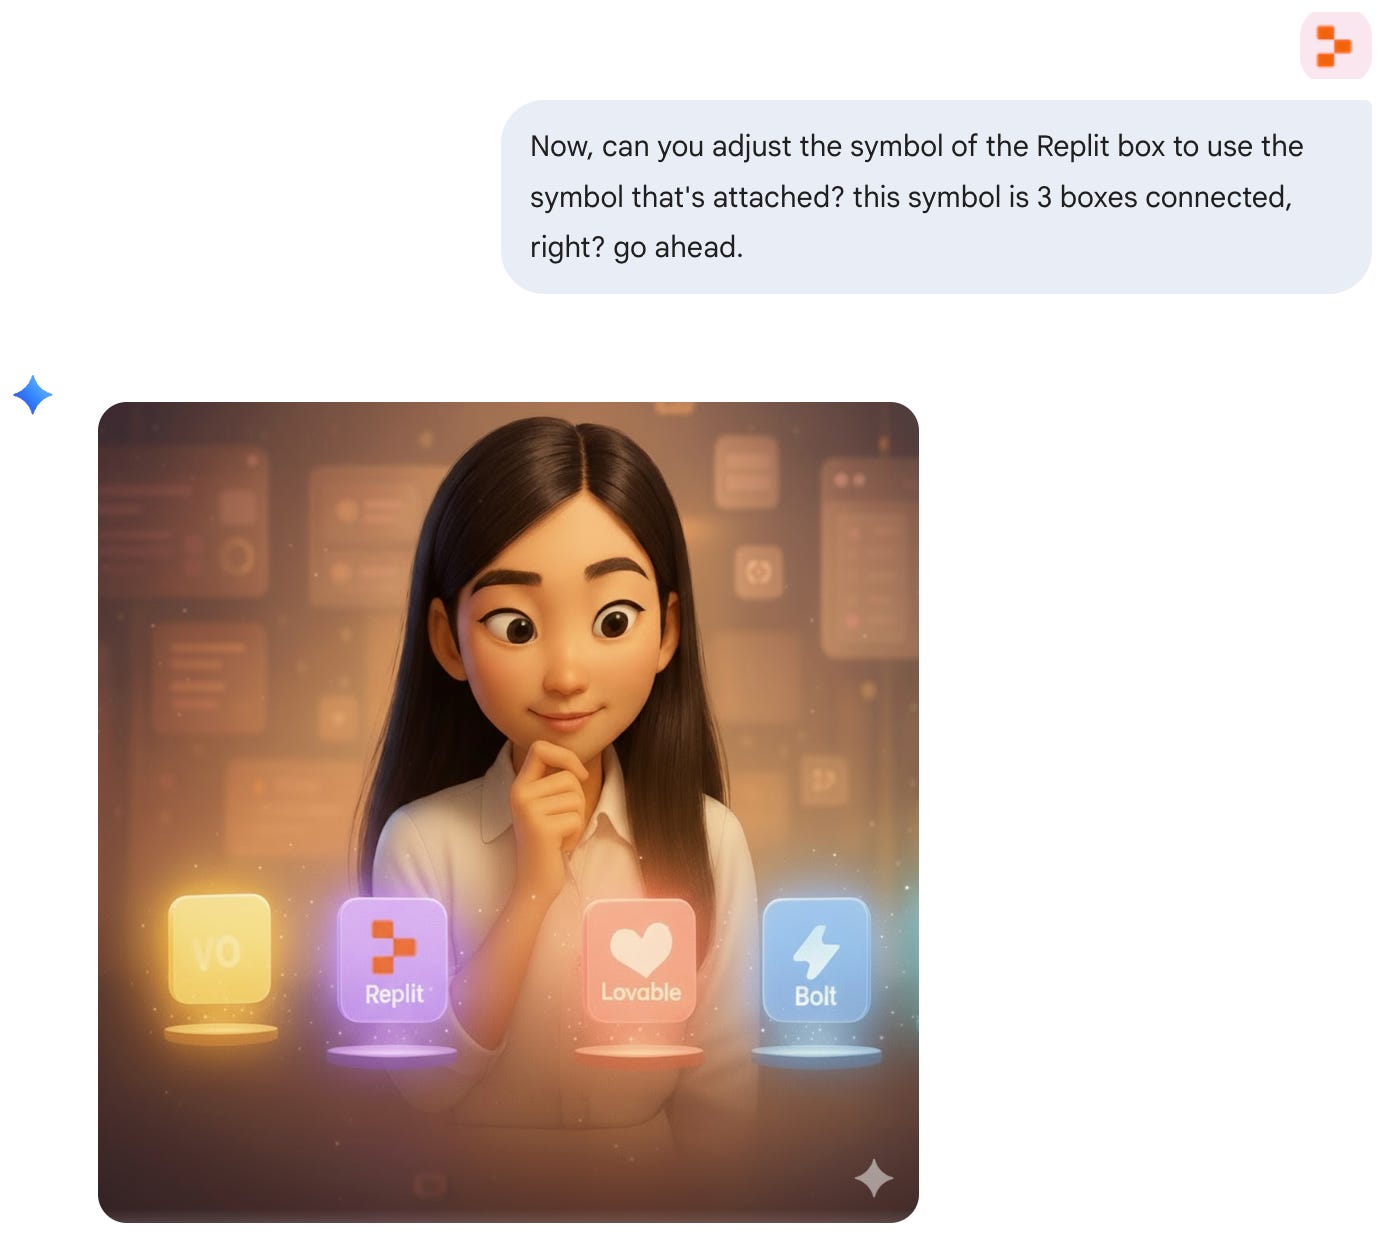
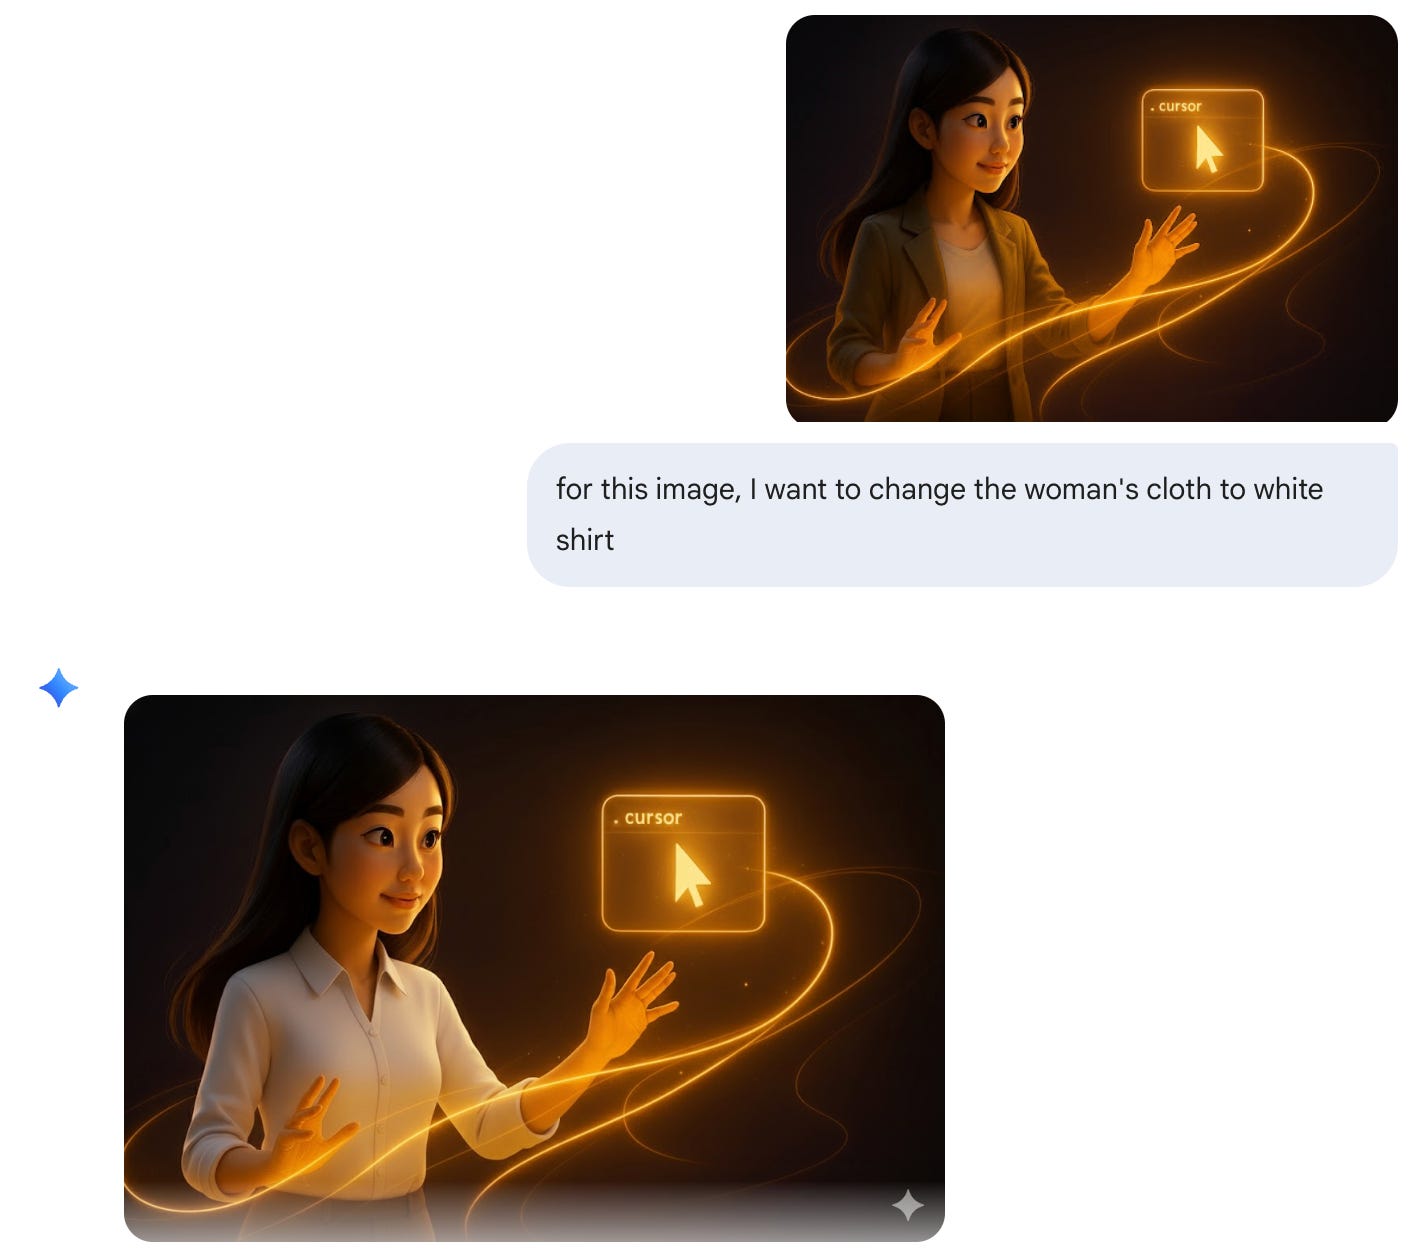
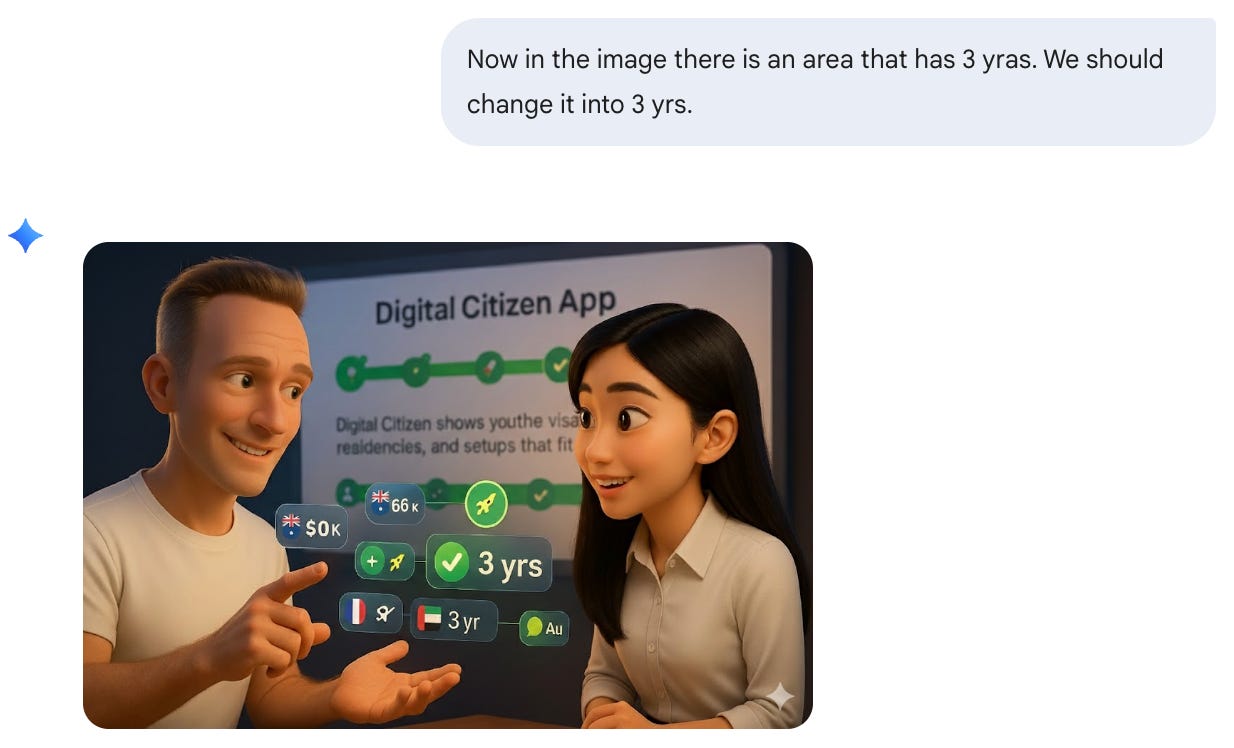
They all worked perfectly for these use cases.
I’m not a Gemini paid member, but the fact that it’s able to generate such consistent images for these tasks makes sense. If I were starting new, I’d probably just go with Gemini because it’s so fast, cheap, and also pretty consistent.
The fact that
& have been using Gemini for their images consistently already shows its superpower. I have historical reasons for sticking with my current setup, I’ve built a system around ChatGPT 4o that works. But that doesn’t mean it’s the only viable approach.4. How to Automate the Entire Image Creation Workflow
From here, it’s already the complete story. But if you’re like me and hate repetitive friction, you’d see the annoyance.
The Friction Without Automation
Every time I needed an image:
Think of ideas and concepts for the image
Write up the prompt from scratch
Tweak the prompt to include all my style preferences
Adjust positioning, gesture, background color preferences
Iterate until it matches what I expect
Many times, it was just failure, or I simply didn’t like the result at all. I have particular preferences about what positions the character should be in, what gestures work, what background colors fit my brand.
Time per image: 15-20 minutes Satisfaction rate: About 40% (yes, 60% of the time I was dissatisfied or had to start over)
Because if you don’t constrain those details, the results are just... really really unsophisticated.
The Solution: Slash Commands in Cursor
You know I love doing everything inside Cursor, including writing. So I created a particular slash command that helps me generate those prompts with minimal repetitive intervention.
Sometimes I’m particular about what the image should be like, and I’ll specify details. Other times, I let Cursor free-form the prompt based on the article topic.
How it works:
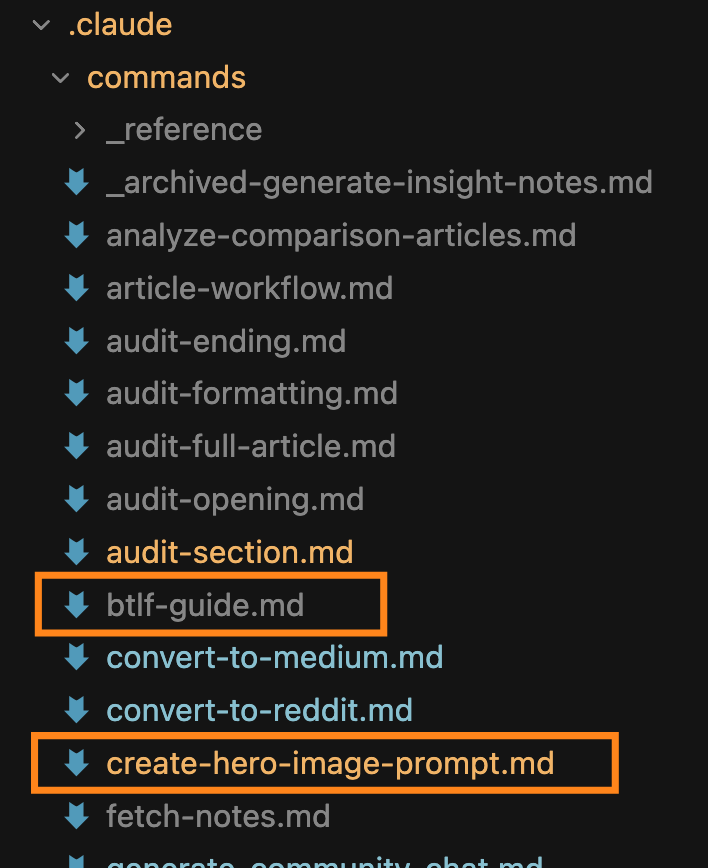
Type
/create-hero-image-prompt [article topic/description]in CursorThe command generates a brand-consistent, detailed prompt in a few seconds
Copy-paste the prompt to ChatGPT’s Image project
Generate the image
Result: Usually 1-3 shots to get a satisfying image. 90% first-try success rate.
Time per image: Under 30 seconds for prompt generation, then standard image generation time
And it’s not for standard single-character articles only. I have another slash command btlf-guide specifically for my Build to Launch Friday series where I need two persons interacting with each other. Different scenarios, different conversations, different dynamics. The same systematic approach applies: describe the interaction, the command generates the prompt, paste and generate.
What Actually Changed
The metrics tell part of the story (20 minutes down to seconds, 40% satisfaction up to 90%). But the real transformation is cognitive.
I’m no longer thinking “what exact words describe my style?” or “did I remember to specify the background color preference?” The system remembers. I only think about what the image needs to convey for this specific article, and the automation handles the rest.
The friction disappeared completely.
Your Turn
What About You?
What is your favorite image style?
What would be your brand image style?
What AI tool would you use for consistent image creation?
I’d love to hear from you.
Everything in this article (the complete framework, the workflow, and one example prompt) is already a great starting point for you.
If you’re a paid member and want to automate the entire thing like I did, I’m sharing:
The exact ChatGPT project setup with system prompt that maintains character consistency
3 Cursor slash commands:
/hero-image-prompt- Generates brand-consistent prompts for article hero images/btlf-guide- Creates prompts for alternative poses and expressions/scene-builder- Constructs specific background scenarios
Import-ready .md file that you can upload to Claude, ChatGPT, or Gemini to generate image prompts or images directly
The outcome: Go from 20 minutes of manual prompt crafting and image iteration to 10 seconds of automated generation. From 60% satisfaction to 90% first-try success.
Access the consistent image creation resource here.
Build to Launch Updates
From the Community:
I talked about creating consistent images with ChatGPT and my honest takes on Gemini (NanoBanana). But if you want to going deeper with Gemini, you don’t want to miss these 3:
- has a hands-on NanoBanana post that will blow your mind.
- as broken down 9 real workflows for using NanoBanana you’ll want to take away.
The AI legend
simply said it best: “The new nano-banana-pro is... bananas.”
From Myself:
After discussions with community members and independent research, I created a Medium Publication and a Reddit community to amplify Vibe Coding Builders’ voices. Looking to distribute your products further? Check it out.
With many guest posts and Build to Launch Friday series, I finally created guidelines for guest writing and collaboration. Interested in working together? Reach out anytime.
On the solo income front: I never thought I’d be picking up high-ticket projects or offering paid consulting within one year of writing online, yet here we are. If you have a specific problem and want my input on technical possibilities and feasibilities, feel free to reach out. I might even write about these experiences down the road.
Happy holidays.
— Jenny
Great article folks need to share!
You're right about Gemini, though I have to say Nano is so helpful in refashioning a scene or character pose to then go back to vid prompt where I'm using Grok to create the fillers to mix with HeyGen voicings. Heck, even Playground now uses Nano!
I have a group of over 10 individually "personalitied" AI Actors with one of the mains being blind. A major challenge (back during Kling/Luma, even HeyGen) was trying to achieve the blind character with the white cane... thankfully both Veo and Grok will do it right!
Above I brag about Veo/Grok, and then fell waist deep into bias as I introduced a new character, female Brazilian with a darker complexion. Doing scene of her getting on yacht, then going back to computer lab, all of a sudden the tools were trying to turn Yara white, in fact to look like Tinkerbell (and Yara represents the villain)...
Trust me readers, Jenny has to face that often and advice regarding the group of prompts to that end is vital!
Advice from me would be if you're creating a new personality, not using a caricature of yourself, you need to share it on the world stage off/on enough to have a record of that look/voice is (name of character). Are folks going to copy? Yes. You just have to keep posting.
Jenny! Reporting back! I tried your system and it completely transformed my brand. I tested five art styles, rebuilt the whole workflow, and finally landed on the consistency that works for me, which turned out to be different from what works best for you.
That’s the beauty of your method, it gives everyone a framework to experiment and find their own fit. AI Meets Girlboss 2.0 is now officially live. 🩷
Thank you for sharing your process so generously, it gave me a system I didn’t even know I needed. Here’s the full deep dive if you want to see the results:
https://aimeetsgirlboss.substack.com/p/i-let-ai-redesign-my-face-5-times
Thanks, again, I'll be eternally grateful! ✨🦩